A three-way thread ball valve is one of those essential pieces of plumbing that everyone ought to know how to assemble. In fact, it’s such a common part of the industry that there are several ways to do it, depending on your needs.
In this blog post, we will show you how to assemble a three-way thread ball valve using the easiest and most foolproof method. After reading this, you will be able to install one in no time at all!
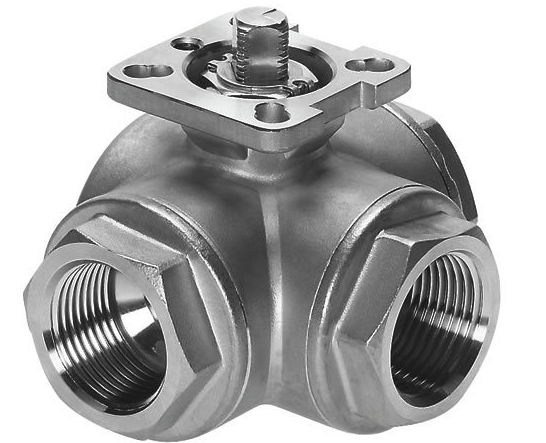
What is a three-way thread ball valve?
A three-way thread ball valve is a valve that allows for three separate flows of water, gas, or fluid. These valves are commonly used in industrial settings to control the flow of fluids and gases. They can also be used in residential plumbing systems to allow multiple people to use the shower at the same time while preventing flooding.
To assemble a three-way thread ball valve, you will need the following parts:
1) A threaded pipe fitting that measures 3 inches in diameter
2) Two end caps that fit onto the piping fitting and have a hole in them that matches up with the threaded pipe fitting
3) A washer and nut
4) A three-way thread ball valve
What are the different types of three-way thread ball valves?
A three-way thread ball valve is a valve that allows you to switch between two different directions of flow. They come in both manual and automatic versions and are often used in industrial settings to control the flow of water, oil, or other fluid substances.
To assemble a three-way thread ball valve, start by locating the flanges on either side of the stem. Then, insert the stem into one of the flanges until it is flush with the surface. Finally, thread the other flange onto the stem so that it is secure.
How to assemble a three-way thread ball valve
Step 1: Assemble the male and female valve body parts.
The male valve body part should be inserted into the female valve body part with the threading area facing out. The threaded end of the male valve should fit onto the threaded end of the female valve. Make sure that both valves are oriented correctly before continuing.
Step 2: Insert a locking ring into one of the threads on each side of the ball valve.
The locking ring is used to keep the ball valves in place during assembly. Insert each locking ring into a different thread on each side of the ball valve. Once inserted, twist each ring until it forms a secure seal against the respective threads. Do not over-tighten these rings as this can cause damage to your ball valves.
Step 3:attach the check lever arm to one side of each ball valve using washers, screws, and an Allen wrench (if applicable).
NOTE: If your check lever arm is adjustable, you will need to attach it using an Allen wrench BEFORE attaching it to either side of the ball valves.
Attach one screw to each end of the check lever arm and tighten using an Allen wrench (if applicable). Repeat for another side of the ball valves. Be sure that both screws are equally tightened so that there is no play in between them when adjusting or moving the check lever arm later on!
Tips for Keeping Your Thread Ball Valve Functional
1. Prior to assembly, make sure the parts are clean and free from oils, grease, or other contaminants.
2. Use a small straight edge to lightly mark the locations of the two rubber washers on each side of the threaded ball valve body.
3. Apply a light coat of silicone fluid to each washer and insert it into the marked location on the threaded ball valve body.
4. With the help of a second person, carefully tighten the two wing nuts against each other until they are flush with the threaded ball valve body (the washers will protrude slightly).
5. Repeat steps 2 through 4 for each wing nut on either side of the threaded ball valve body. Be sure to evenly distribute silicone around all four wing nuts. The completed threaded ball valves should look like this:
6. Position one end of each watertight hose nipple over one wing nut on one side of the threaded ball valve body and thread one end of the hose nipple through the corresponding hole in the opposite side of the tubing (use a wrench to tighten if necessary). Make sure that both ends of each hose nipple are fully seated in their respective holes in tubing before continuing (if not, use a small screwdriver to gently nudge/poke both ends into place).
Materials
If you need a three-way valve to control water flow in three different directions, then this is the perfect DIY project for you! All you need to complete this project is a few basic materials and some time.
To make the valve, you will need a plastic bottle, scissors, thread, needle, and felt pads. First, cut the top off of the bottle so that it is roughly U-shaped. Then snip down one of the sides of the bottle so that it forms an ‘L’ shape. Cut out a piece of felt large enough to fit over both L-sides of the bottle.
Thread a needle and tie a knot in one end of the thread. Thread one end of the thread through one hole in the top of the L-shape felt pad and tie it off in a knot on top of the pad. Thread another end of thread through another hole in felt pad and tie it off below pad on bottle bottom side. Repeat the process for the second hole on the opposite side of the L-shape felt pad.
Now that both ends of the thread are tied off, put your valve together by lining up one side of felt with the top opening on the bottle and pressing against the edge to hold it in place while you stitch around the entire circumference. Once stitched, pull tight and trim excess fabric from the edges so that they are even with the rest of Bottle’s top edge. Repeat the process for another side of the valve.
Tools
Thread ball valves come in a variety of types and sizes, which is why it can be hard to choose just the right one for your project. In this article, we’ll show you how to assemble a three-way thread ball valve using simple tools.
To begin, you’ll need a threaded rod, washer, and nut. The threaded rod should have a diameter that’s slightly smaller than the ball valve’s opening and an equal number of threads on each side. Washer the rod and nut onto the valve body. Tighten the nut until it’s snug against the washer, but don’t over-tighten it – you only need enough pressure to keep the rod and washer together. Finally, attach the open end of the threaded rod to one of the valve’s handle openings.
Instructions
This is a three-way thread ball valve. It consists of a threaded body, a compression nut on the threaded end, and a washer on the other end. The easiest way to assemble it is to start by screwing the compression nut on the threaded end until it’s tight. Then put the washer on and screw the other end of the nut on top of it. Finally, put the threaded body onto the two ends and tighten everything down.
Conclusion
Assembling a three-way thread ball valve is not as difficult as it seems, and with the right tools, you can do it in no time at all. Now that you know how to put together this common plumbing fixture, be sure to keep it stocked in your toolbox so that you can fix any pesky water leaks quickly and easily.